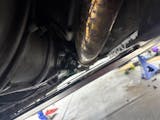
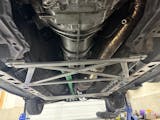
Flyin' Miata complete butterfly brace v2.1
Flyin' Miata complete butterfly brace v2.1
Exclusive to Flyin' Miata!
Couldn't load pickup availability
Collapsible content
Description
Our original butterfly brace was a very popular upgrade for NA and NB Miatas. Now it's better in every way! It has more ground clearance, it's more effective, it's easier to install and it costs less.
First, why do you want chassis rigidity? Because a stiff structure allows the suspension to work better. If your chassis flexes, it's basically a big undamped spring that changes your suspension geometry under load and shudders every time you hit a bump. A stiff chassis will give your suspension a solid platform to work from, leading to better, more predictable handling as well as improved ride quality. There really is no downside. Chassis stiffness is usually measured as torsional rigidity - resistance to twist - because that's how loads usually travel through a car.
When it came time to update the design of our popular and effective butterfly brace, we did it properly. We tested Miatas in a variety of configurations, from a high mileage 1990 to a late NB with the full Sport bracing. Here are some of the highlights:
- The new design is stiffer than the original design
- The new design ties right into the front subframe mount points
- Fuel/brake lines have more room than with the original design
- The new design fits a wider range of cars and exhausts
- The new design includes mounting points for attaching a flat undertray (not currently available)
- The new design is dramatically easier to install and remove for service.
Ground clearance is unchanged from the factory Sport bracing. The new design gives more clearance for various exhaust configurations and is easier to remove if you need to do work like dropping the trans. It's fully compatible with factory front and rear subframe braces. Cars with the "Sport" undercar bracing will have to remove two cross braces in the center. It's made of stainless steel so there is no concern about rust. Total weight is 33 lbs, low and in the center of the car.
The butterfly brace includes our frame rail kit and supplements it with two cross-braces. If you already have our version 2.0 frame rails (the ones with Flyin' Miata cut through the sides), you can add the butterfly brace upgrade. If you have our older frame rails then they're unfortunately not directly compatible without welding in some mounting plates.
The differences between the 2.0 and 2.1 butterfly brace designs are minor, and they are interchangable. The primary modifications have been for more consistent quality.
Stiffer. Easier to install. Lower price. Now that is progress.
Instructions
Shipping
What does it fit?
Fits: 1990, 1991, 1992, 1993, 1994, 1995, 1996, 1996, 1997, 1999, 2000, 2001, 2002, 2003, 2004, 2004 MSM, 2005, 2005 MSM
Emissions
Emissions do not apply.
Warranty
1 year
SKU
I have a 91 chassis with a 94 motor on blackbird drop mounts (lowers motor by a claimed 1/2") using Roadster Sport header and Roadster Sport catback exhaust. I was concerned that since the listing mentions that clearance can be tight on some exhausts, the fact that I was running a lower motor mount might exacerbate that issue. I am very glad though that with my setup I have plenty of clearance. I did buy FMs poly exhaust bushings though to make sure my rubber ones wouldn't give me problems.
Because I am running poly control arm bushings, diff bushings, and engine mounts, I used to struggle with a lot of interior rattles. I was working on stiffening the chassis and this was the last modification on that route that I got around to. Before this I had installed a Hard Dog M2 roll bar, Cybul strut tower brace, Paco strong arms, and Flyin Miata rear cannon subframe brace. All of these increased rigidity of the car in positive ways, but did not really do much in terms of combating the rattles. But as soon as I got the frame rails and butterfly brace on then those rattles are almost completely eliminated (a certain low RPM, probably somewhere between idle and 2.2k or so, still has a bit of rattling). Also, the stiffness difference with this piece, even though I had done everything else before, was night and day better. Really happy with how the car feels now.
I was able to install this by myself without too much work, but it wasn't straight forward. I had significant stock frame rail damage on my Miata, so it took a lot of "convincing" to get the frame rails installed. Had to reshape the stock frame rails with a lot of hammering to get anywhere close to getting the frame rails installed. This ended up helping with installation though as the frame rails gripped the chassis without need of me using a jack or my hands to hold it in place.
Obviously this will reduce your ground clearance. My Miata runs lower (I don't know what stock ride height is, so I have never measured my current ride height). This makes it so it is really hard to get out of my driveway since my city decided that half curbs are a decent approach... :( Anyway, I have to be careful of that, and I accidentally clobbered a small rock that had eroded off the mountain, while canyon carving, that I didn't expect to make contact. The rock was only a few inches tall, but I wasn't used to thinking about the butterfly brace being the lowest point on the car when deciding whether I should cut across the double yellow to avoid the rock.
Again I really like this setup, I like how it mounts up to the car, I love the stiffness and reduced rattles that it offers, and overall it has good quality to it.
tldr; This is arguably the best upgrade I've done for my '93. I'd argue 30% improvement in stiffness.
My Miata life started with an '02 NB with delrin door bushings and Megan EZ-II's, but no other suspension changes or stiffening to speak of. Of my own accord, I would have ballparked the door bushings alone (in both the NB, and NA) as a 3-5% improvement in stiffness. If you check the FM Door Bushing page, you will see that they have measured a "3% improvement in torsional rigidity on a 1990" and I think that is spot on, based on my experience with both my NB and now my NA.
One of my hesitations on pulling the trigger with the Frame Rails + Butterfly Brace, was the lack of any indication of a stiffness improvement expressed in a similar percentage. After calibrating my personal "StiffyDyno™", I would personally ballpark the improvement (for my specific NA with a mangled driver side frame rail) at around 30% improvement. It is seriously shocking how transformative this can be for your car.
I used to grit my teeth over potholes, but that is a thing of the past. The added stiffness truly does allow my suspension to actually do it's job, rather than just shove the body of the car around.
Just a few notes:
1) I used QuickJacks to get under the car, and did the entire install solo. It is possible to do, but if you can have a helper, get them. It's a lot of up and down, otherwise.
2) Do yourself a huge favor and grab some titanium drill bits from Home Depot etc. - probably 10x better/easier than forcing a wood bit through your floor.
3) I did snap like 2 nuts off the bolts while tightening. Not sure why, I was totally within the torque spec. A couple extra pieces of hardware would be appreciated (like 2-3) to avoid having to stop and run to the hardware store. Or overkill it and just send grade 10.9!
Thanks for your review! We're glad to hear that our Complete Butterfly Brace made such a positive impact on your Miata! 😀 Sorry to hear about the snapped hardware, though! That's pretty unusual. If this kind of thing happens in the future, please reach out to us directly so we can help get you sorted with replacement hardware, etc.
Was paranoid about drilling into the car like others. Mine being a 94, take extra care when drilling by the ecu. This is a good time to lay down sound deadener/carpet padding. The video seriously helps with install and I love that FM takes the time to make tutorials. These were the last (and most anticipated) bracing mod I did to my car so perhaps the results weren't as dramatic as I was hoping for. The car also has Paco strong arms and FM STB. Yes the car feels more solid, it takes bumps better. Doesn't completely eliminate NVH but helps make a 30+ year old convertible stiffer. You can feel the added weight, seems to give the car a more substantial base to let the suspension do its job better but a vintage car will still flex and rattle . Also, even though my motor mounts were new and exhaust hangers in okay shape, I did have to dimple the stock down pipe slightly for clearance. ymmv. Having a lift and someone to help torque the hardware down would save so much time.
I've been upgrading my NA Miata exclusively with Flyin' Miata (FM) components since 2001, starting with the FM II Turbo Kit. Over the years, I've made more than 30 major upgrades to my car using FM products. After the FM II Turbo Kit, this latest upgrade is, without a doubt, the most transformative. In my 20+ years of ownership, my Miata now feels like a different / brand-new car. If you're considering this upgrade, don't hesitate—it's worth every penny. I only wish I had done it sooner.
I installed this in my 1996 miata and it made the car feel so much more rigid. Installation was simple and straight forward. As long as you follow the directions on the frame rail installation the butterfly braces fit spot on. It was an easy install for me, took about an hour and a half, with a good chunk of that time markings and drilling holes. I recommend getting a good drill bit it makes the job a lot easier. Hardware worked excellent with none breaking or stripping before reaching the recommend torque specs the directions provided.


